Twisting Triangle aka Parivrtta Trikonasana is a powerful posture that requires strength, focus and balance. To achieve correct alignment all the way through can be challenging and it is therefore recommended to use a block while starting to practice this posture.
Pose Summary
Steps
Step 1
Begin in Tadasana (Mountain Pose) with your feet together and arms alongside your body. Distribute the weight evenly in your feet. If you have a hard time staying balanced here stand with the feet parallel and hip distance apart.
Step 2
On an exhale, step your left leg about 3 to 4 feet in back of you and turn that back foot at about a 45 degree angle so that the toes are pointed towards the top left corner of your mat. The front toes are pointed forwards and are parallel with the front edge of your mat.
Step 3
You want to have a heel to heel alignment between the feet. For more stability you can walk the right foot out to the right a few inches. Root down firmly through both feet by lifting the inner arches and pressing down the outer side of the foot.
Step 4
Microbend your knees to avoid overextension of the knee joint.
Step 5
Hips are square, parallel with the short edge of the mat.
Step 6
Engage the belly by gently drawing the navel in and up towards the spine.
Step 7
On an inhale, lift the arms up to the sky, keeping the shoulders down creating space between shoulders and ears.
Step 8
On an exhale begin to fold forward with a flat back until your upper body and arms are parallel to the floor with the spine straight.
Step 9
Check that your hips are still square. If you have a mirror available look at yourself in this pose from the side and many times the front leg buttock comes forward. To fix this place your right thumb into your front leg hip crease and press your hip back until hips are square again.
Step 10
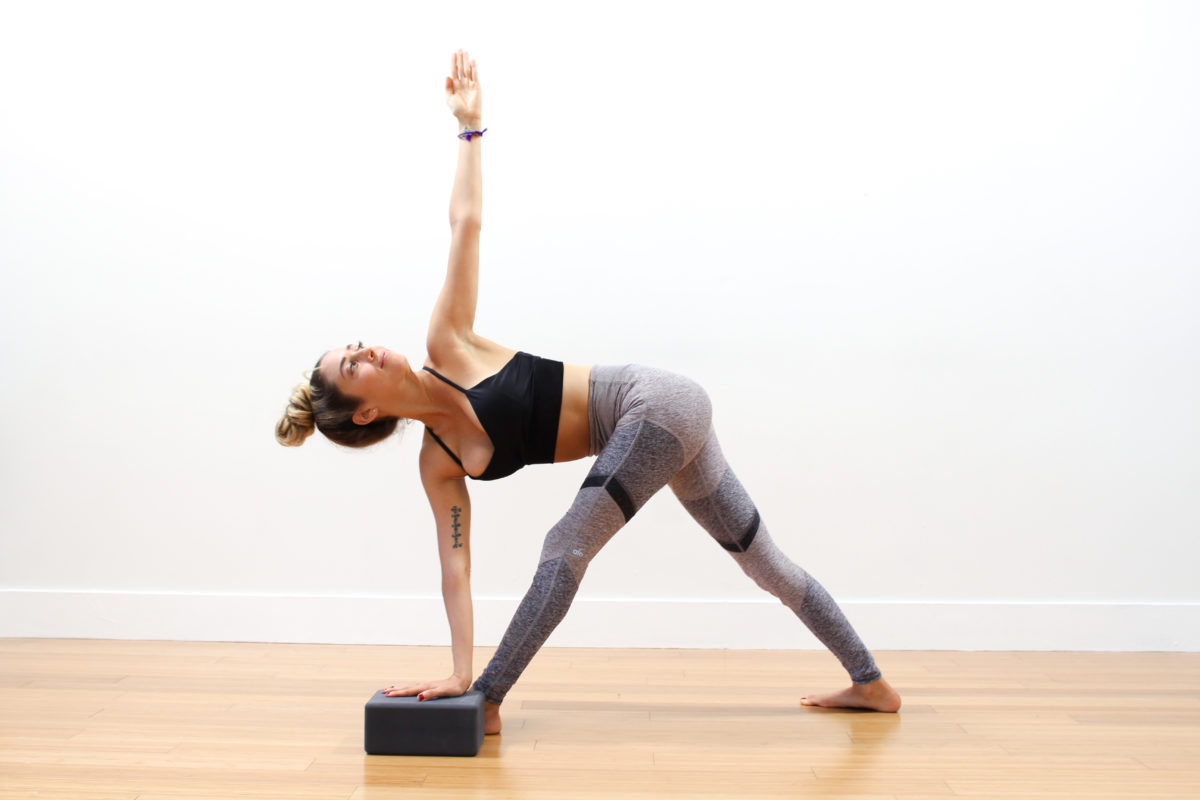
Drop your left arm down and reach your fingers to the outside of your right foot, palm facing out.
Modifications: Use a block on the tall or medium setting on the inside of your right foot. This will help you to keep your hips square and your spine long and to isolate the twist in your thoracic spine. Eventually you could work towards lowering the block or placing it on the outside of the right foot. This takes time and practice so be patient and practice good habits and your body will thank you!
Step 11
Start twisting from your midback and up while extending your right arm up to the sky.
Step 12
Again check that your hips are still square. This is where the pose gets very tricky to maintain correct alignment so it can be useful to keep your left hand on a block outside the right foot if your hamstrings are tight and/or to keep the hips square.
Step 13
Keep neck aligned with spine and look up towards your raised hand.
Step 14
To release, gently bring the raised hand down again, bend the front knee and place the palms on the earth. Step the back leg forward, bring your hands to your hips and lift up with a flat back to return to mountain pose. Repeat on the other side.
Benefits
- Stretches hamstrings, groins and hips
- Strengthens the ankles
- Massages the digestive organs and improves digestion
- Promotes balance, stability and stamina in the body and mind
- Tones buttock, legs and core
- Opens the chest and gives flexibility to the shoulders
Contraindications
- High or low blood pressure
- Diarrhea
- Headaches
- Pregnant women should avoid this and other twisting postures once the belly has popped
- Neck injuries should keep the gaze forwards NOT upwards