Bound Extended Side Angle starts with Extended Side Angle Pose and adds a bind and an open twist. If your shoulder girdles are flexible and hips are open then this pose should be nice way to take your Side Angle Pose to another level.
Pose Summary
Steps
Step 1
Begin in Tadasana (mountain pose) with your feet together and arms alongside your body. Distribute the weight evenly in your feet.
Step 2
On an exhale, step your left leg about 4 to 5 feet in back of you and turn that back foot at about a 80 degrees angle. You want the front heel to be aligned with the arch of the back foot.
Step 3
Bend the right (front) knee to 90 degrees so that the knee is directly over the ankle and the shin is perpendicular to the earth. The knee should be tracking over the second and third toe. Distribute the weight evenly through that front foot as you lift the inner arch and root down through the corners of the feet. The front toes are pointed forwards and are parallel with the front edge of your mat.
Step 4
Engage the quad of the back leg. The leg should be straight without locking out the knee. Root down the outer edge of the back foot into the earth as you press into the big toe mount.
Step 5
The hips are facing the length of your mat and bring a gentle engagement to your belly by drawing the navel in and up towards the spine. Lengthen your tailbone down towards the earth.
Step 6
On an inhale, lift the arms to shoulder height, palms face down towards the ground. Relax the shoulders away from the ears and reach through your fingertips. This is Warrior II.
Step 7
On an exhale, lower your right forearm to the right thigh and extend the left arm up towards the sky.
Step 8
Plug the left arm bone into its socket and extend the arm above your head. The bicep is directly above the left ear and the fingertips are actively reaching forwards. Bring your gaze to the extended bicep.
Step 9
Use the core muscles to hold you in this position rather than dumping the weight into your right forearm.
Step 10
After a few breaths, extend the right hand/fingertips down to the ground. Rotate the left tricep so that the palm of the left faces in back of you.
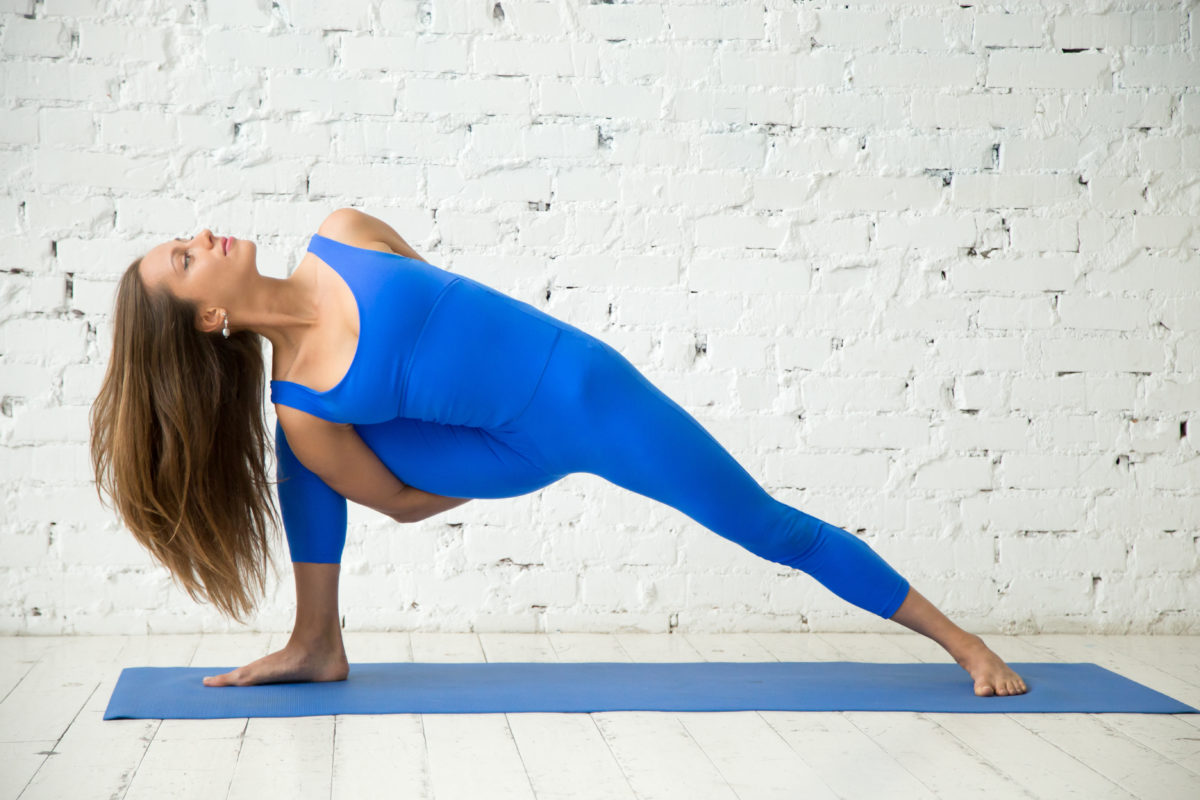
Step 11
Engage the core even more and bend the left elbow reaching the left arm behind your back. Reach the right hand through the opening of the legs. Hook the fingers of the left and right hands together or wrap the left index and thumb around the right wrist. Open the heart up to the sky as you peel the left shoulder back creating more space.
**There is a tendency to collapse in the right hip crease. To counter this tendency continue to create more length and space in the right hip crease with every inhale and twist a little deeper rolling the left shoulder back with every exhale.
Step 12
Ensure that the right knee is not splaying outwards or dropping in. Stay grounded through both feet.
Step 13
To get out of the posture, release the bind then use the strength of your core to come back to warrior 2. Straighten the front leg, lower the arms and step back to mountain pose. Repeat on the left side
Benefits
- Stretches groin, hamstrings, shoulders and back
- Tones core muscles, legs, knees and ankles
- Therapeutic for constipation, infertility, sciatica, menstrual discomfort, and low back pain
Contraindications
- Headaches
- Insomnia
- High or low blood pressure
- Neck injury keep the gaze forwards instead of upwards